上一期我们主要介绍了如何用 Electron+vue+vite 搭建桌面端应用(一),只是简单创建了一个项目还有很多内容需要完善,今天来介绍下 vue3 项目开发的配套设施 vue+vue-router+pinia+element-plus 以及 eslint+prettier 等,比较熟悉的同学可以直接略过。
安装 vue-router
yarn add vue-router@4.1.2
cd src && mkdir router && cd router && touch index.ts
编辑 index.ts
import { createRouter, createWebHashHistory, RouteRecordRaw } from "vue-router";

import loginComponent from "@/views/login/login.vue";
import homeComponent from "@/views/home/index.vue";

const routes: RouteRecordRaw[] = [
  {
    path: "/login",
    name: "login",
    meta: {
      title: "登录",
    },
    component: loginComponent,
  },
  {
    path: "/",
    name: "home",
    meta: {
      title: "首页",
    },
    component: homeComponent,
  },
];
const router = createRouter({
  history: createWebHashHistory(), // 注意这里不能用history模式
  routes,
});

export default router;
这里为什么不能用 history 模式可以参考从源码分析为什么 electron+vue 项目中 router 不能用 history 模式
这里为了快速引入文件使用了路径别名@,需要做以下设置
// vite.config.ts
resolve: {
  extensions: [".ts",".tsx", ".js"],
  alias: {
    "@": resolvePath("./src"),
  },
},
// tsconfig.json
"baseUrl": "./",
"paths": {
  "@/*": ["src/*"]
},
修改 main.ts
import { createApp } from "vue";
import "./style.css";
import App from "./App.vue";
import router from "./router";

const app = createApp(App);
app.use(router);
app.mount("#app");
修改 app.vue
<template>
<router-view></router-view>
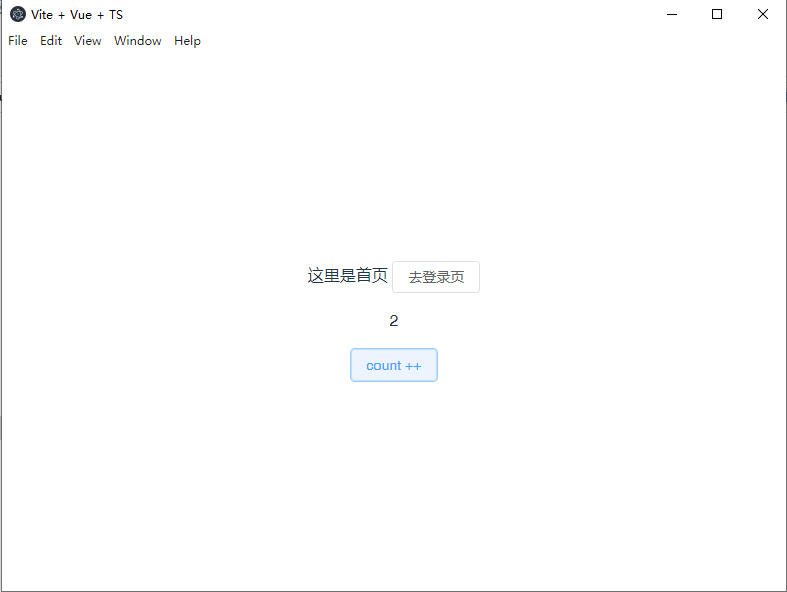
</template>修改 home.vue 加入路由跳转
import { useRouter } from "vue-router";
const router = useRouter();

const goLogin = () => {
  router.push({
    path: "/login",
  });
};执行yarn dev可看到路由可以正常切换
安装 pinia
yarn add pinia@2.0.16
cd src && mkdir stores && cd stores && touch counter.ts
编辑 counter.ts
import { defineStore } from "pinia";

export const useCounterStore = defineStore("counter", {
  state: () => ({ count: 0 }),
  getters: {},
  actions: {
    increment() {
      this.count++;
    },
  },
});
修改 main.ts 添加 pinia
import { createPinia } from "pinia";

const pinia = createPinia();
app.use(pinia);
安装 element-plus
yarn add element-plus修改 main.ts
import ElementPlus from "element-plus";
import "element-plus/dist/index.css";
import zhCn from "element-plus/es/locale/lang/zh-cn";

app.use(ElementPlus, {
  locale: zhCn,
});
这里通过插件采用自动导入
yarn add unplugin-vue-components unplugin-auto-import -D修改 vite.config.ts
import { defineConfig } from "vite";
import AutoImport from "unplugin-auto-import/vite";
import Components from "unplugin-vue-components/vite";
import { ElementPlusResolver } from "unplugin-vue-components/resolvers";

export default defineConfig({
  // ...
  plugins: [
    // ...
    AutoImport({
      resolvers: [ElementPlusResolver()],
    }),
    Components({
      resolvers: [ElementPlusResolver()],
    }),
  ],
});
至此 vue3 全家桶及 element-plus 库已经正常引入项目
安装 axios 并设置请求和响应拦截器
yarn add axios@0.27.2在 utils 文件夹下新建 request.ts
import axios, {
  AxiosError,
  AxiosInstance,
  AxiosRequestConfig,
  AxiosResponse,
} from "axios";
import { ElMessage } from "element-plus";
import qs from "qs";

// 创建一个 axios 实例
const service: AxiosInstance = axios.create({
  baseURL: "/",
  timeout: 50000,
  headers: { "Content-Type": "application/json" },
});

// 添加请求拦截器
service.interceptors.request.use(
  (config: AxiosRequestConfig) => {
    if (!config.headers) return;

    if (
      config.headers["Content-Type"] === "application/x-www-form-urlencoded"
    ) {
      config.data = qs.stringify(config.data);
    }
    return config;
  },
  (error: AxiosError) => {
    // 对请求错误做些什么
    return Promise.reject(error);
  },
);

// 添加响应拦截器
service.interceptors.response.use(
  (response: AxiosResponse) => {
    const res = response.data;
    const config = response?.config as AxiosRequestConfig & {
      showErrorMessage: boolean;
    };
    if (res.code && res.code !== 200) {
      // `token` 过期或者账号已在别处登录
      if (res.code === 401) {
        return Promise.reject(res);
      }

      if (config?.showErrorMessage !== false) ElMessage.error(res.msg);
      return Promise.reject(res);
    }
    return Promise.resolve(res);
  },
  (error: AxiosError) => {
    const response = error.response;
    const config = response?.config as AxiosRequestConfig & {
      showErrorMessage: boolean;
    };
    if (error.message.indexOf("timeout") != -1) {
      ElMessage.error("网络超时");
    } else if (error.message == "Network Error") {
      ElMessage.error("网络连接错误");
    } else {
      if (config?.showErrorMessage !== false) ElMessage.error(error.message);
    }
    return Promise.reject(error);
  },
);

export default service;
这里只是简单的设置了一下,具体的设置还需要根据项目的要求来
vue3API 自动导入
在 vite.config.ts 文件中添加配置
plugins: [
  //...
  AutoImport({
    //...
    imports: ["vue"],
  }),
];
注意 如果项目中使用了 eslint,直接在文件中使用 vue 的 api 会提示报错
解决办法:
yarn add vue-global-api -D// eslintrc.js
module.exports = {
// ...
extends: [
// ...
"vue-global-api",
],
};//main.ts
import "vue-global-api";安装初始化样式 normalize.css
yarn add normalize.css@8.0.1在 main.ts 中引入
// main.ts
import "normalize.css/normalize.css";
安装 eslint
yarn add eslint@7.32.0 eslint-plugin-vue@7.15.1 @typescript-eslint/parser@5.30.7 @typescript-eslint/eslint-plugin@5.30.7 eslint-plugin-simple-import-sort@7.0.0 -Deslint-plugin-vue:Vue.js 的官方 ESLint 插件
@typescript-eslint/parser:ESLint 的解析器,用于解析 typescript,从而检查和规范 Typescript 代码
@typescript-eslint/eslint-plugin:ESLint 插件,包含了各类定义好的检测 Typescript 代码的规范
eslint-plugin-simple-import-sort:自动排序 import 的插件
在项目根目录下新建.eslintrc.js
module.exports = {
  env: {
    browser: true,
    es2021: true,
    node: true,
  }, //定义eslint依赖的插件
  plugins: ["@typescript-eslint", "prettier", "simple-import-sort"], //定义文件继承的代码规范
  extends: [
    "plugin:vue/vue3-essential",
    "plugin:vue/vue3-recommended",
    "plugin:prettier/recommended",
  ],
  parserOptions: {
    //解析ts文件
    parser: "@typescript-eslint/parser",
    sourceType: "module",
    ecmaVersion: "latest",
    ecmaFeatures: {
      tsx: true, // 允许解析TSX
    },
  },
  rules: {
    "prettier/prettier": "error",
    "@typescript-eslint/explicit-module-boundary-types": "off",
    "@typescript-eslint/interface-name-prefix": "off",
    "@typescript-eslint/no-empty-function": "off",
    "@typescript-eslint/no-explicit-any": "off",
    "@typescript-eslint/no-var-requires": "off",
    "@typescript-eslint/camelcase": "off",
    "no-console": process.env.NODE_ENV === "production" ? "warn" : "off",
    "no-debugger": process.env.NODE_ENV === "production" ? "warn" : "off",
    "vue/html-self-closing": [
      "error",
      {
        html: {
          component: "always",
          normal: "always",
          void: "any",
        },
        math: "always",
        svg: "always",
      },
    ],
    "vue/require-default-prop": "off",
    "vue/no-v-html": "off",
    "sort-imports": "off",
    "import/order": "off",
    "simple-import-sort/imports": "error",
    "simple-import-sort/exports": "error",
  },
  overrides: [
    {
      files: [
        "**/__tests__/*.{j,t}s?(x)",
        "**/tests/unit/**/*.spec.{j,t}s?(x)",
      ],
      env: {
        jest: true,
      },
    },
  ],
};
安装 prettier
yarn add prettier@2.7.1 eslint-config-prettier@8.5.0 eslint-plugin-prettier@4.2.1 -Deslint-config-prettier
解决 ESLint 中的样式规范和 prettier 中样式规范的冲突,以 prettier 的样式规范为准,使 ESLint 中的样式规范自动失效
eslint-plugin-prettier
将 prettier 作为 ESLint 规范来使用
在根目录下新建.prettierrc.js
module.exports = {
  printWidth: 120,
  proseWrap: "preserve",
  tabWidth: 2,
  semi: true,
  singleQuote: false,
  trailingComma: "none",
  bracketSpacing: true,
  jsxBracketSameLine: false,
  arrowParens: "avoid",
  rangeStart: 0,
  endOfLine: "lf",
  insertPragma: false,
  requirePragma: false,
  useTabs: true,
};
安装 stylelint 规范样式
yarn add stylelint@13.13.1 stylelint-prettier@1.2.0 stylelint-config-prettier@8.0.2
stylelint-config-rational-order@0.1.2 -D
在项目根目录下新建.stylelintrc.js
module.exports = {
  defaultSeverity: "error",
  plugins: ["stylelint-prettier"],
  extends: ["stylelint-prettier/recommended", "stylelint-config-recess-order"],
  rules: {},
};
安装 ls-lint 规范文件名
yarn add @ls-lint/ls-lint@1.10.0 -D在项目跟目录下新建.ls-lint.yml
# 文件名及文件夹名命名规则
ls:
  src/components/*:
    .dir: PascalCase # 组件文件夹名命名模式
  src/views:
    .dir: camelCase | snake_case
  src/stores:
    .dir: camelCase | kebab-case
  src/router:
    .dir: camelCase | kebab-case | regex:^__.+$
  src:
    .ts: camelCase
    .d.ts: camelCase | kebab-case
ignore:
  - .git
  - .husky
  - .vscode
  - app
  - dist
  - release
  - resources
  - node_modules
安装 husky 和 lint-staged
yarn add husky@8.0.0 lint-staged@13.0.3 -D
# 设置husky
npx husky install
npm pkg set scripts.prepare="husky install"
npm pkg set scripts.preinstall="npx only-allow yarn" # 只允许用yarn
npx husky add .husky/commit-msg 'yarn commitlint --edit "$1"'
npx husky add .husky/pre-commit 'yarn lint-staged'
npx husky add .husky/post-merge 'yarn'
在 package.json 中添加 lint-staged 脚本
"lint-staged": {
    "*.{vue,ts,js}": [
      "prettier --write",
      "eslint --fix",
      "ls-lint"
    ],
    "*.{vue,less,scss}": [
      "prettier --write",
      "stylelint --quiet --fix",
      "ls-lint"
    ]
  },
安装 commitlint 规范 git message
yarn add @commitlint/cli@17.0.3 @commitlint/config-conventional@17.0.3 -D在项目根目录下新建.commitlintrc.js
module.exports = {
  extends: ["@commitlint/config-conventional"],
  rules: {
    "type-enum": [
      2,
      "always",
      [
        "wip", // 开发中
        "feat", // 新功能
        "fix", // bug 修复
        "docs", //文档变更
        "style", //样式变更
        "refactor", //重构
        "perf", // 性能优化
        "test", //新增或修订单元测试
        "revert", // 回滚操作
        "chore", //构建过程或辅助工具变更
      ],
    ],
  },
};
安装 conventional-changelog-cli 生成 changelog
yarn add conventional-changelog-cli@2.2.2 -D
npm pkg set scripts.postversion="conventional-changelog -p angular -i CHANGELOG.md -s -r 0"
一般在发新版本时执行 npm version 命令会生成 CHANGELOG.MD 文件
editorConfig 保持多人开发一致编码样式
在项目根目录下新建.editorconfig 文件
[*.{js,jsx,ts,tsx,vue}]
indent_style = tab
indent_size = 2
end_of_line = lf
trim_trailing_whitespace = true
insert_final_newline = true
至此,第二期一个具有路由,状态管理,UI 库,且具备代码规范和 git 提交规范的 vue3 项目搭建完成,第三期准备完善 electron 实战开发用到的相关插件
源码 Github 仓库:electron-vue-vite-template,如果觉得写得不错还希望给个小星星哦。
原文链接: https://jesse121.github.io/blog/articles/2022/08/04.html
版权声明: 转载请注明出处.